 Three basic principles are key when training a dog: consistency, reinforcement (positive or negative), and repetition. Used correctly, these three principles can get your willful canine under control.
The Three (but not Necessarily Easy) Steps
Step 1: Consistency. Consistency teaches the dog what you want it to do with a given command. Consistency requires a lot of discipline, and mostly from the owner. To do otherwise sends your dog mixed signals, and he or she doesn’t know what you want. Worse yet, if you give in to your dog’s demand, e.g., feeding from the table, your dog will learn that if he or she bugs you enough, you will give in. Not good! Because consistency means enforcing a rule no matter how tired, busy, or distracted you are, so before creating a rule, ask yourself if you want to enforce it.
Step 2: Reinforcement. Reinforcement is incentive for your dog to associate a word with an action. Positive reinforcement should be used as much as possible. Treats and clicker training work well. However, sometimes negative reinforcement is necessary, especially with Min Pins. Miniature Pinschers were bred to hunt vermin in castles and on farms. Thus, they were mostly left on their own and had little human interaction. So, while my Min Pins generally prefer that I am pleased with them, it isn’t their whole world. Choose your method of negative reinforcement carefully. The dog should dislike it, but the punishment should be humane, effective, and fit the crime. A squirt with a water gun works with my dogs.
You may read about the “alpha roll,” where the dog owner roughly picks up the dog then takes it to the ground, rolling the dog on its back. I took Zeus–a 10 pound dog–to obedience school, and they advised that I slam him on the ground to show him who was “boss.” This is a BAD practice. You are scaring and possibly hurting the dog. You are creating fear and anxiety, where you want to build trust.
However, I have found that a gentle variation can work well. If you gently roll the dog on its back then place your hand on its chest and speak gruffly, it sends a message that you are the boss. I’ve also found another variation. When my Min Pins are not following commands, or even being aggressive toward me, here is how I make them submit:
I put one hand on their shoulders and another on their hips then force them to lie down. To avoid injury, I don’t press in the middle of their back. I make them stay until they don’t try to get up even if I lift my hands. When they are being particularly stubborn, this can take a while, so be sure to get comfy before starting. Athena was a particularly stubborn Min Pin. She and I did this for 30 minutes before she would stay. However, she was a MUCH better behaved dog afterward. It was well worth my time.
Reinforcement tells your dog that he or she has no choices. Your command must be obeyed, and that is the essence of obedience training.
Step 3: Repetition. Repetition solidifies the command by getting it through to your dog that it must do the command just because you say so. The amount of repetition required will vary depending on the command and the dog. Since Min Pins have such a short attention span, I recommend training 5 minutes per day for as many days as it takes. Don’t get discouraged. The command will eventually sink in. Some dogs can stubbornly resist learning a command.
My first dog, Zeus, for example refused to learn the command “play dead.” However, I was more stubborn that he was. I spent 5 minutes training this one trick a day for a year. Why did it take so long? My theory is that lying with his belly exposed was a very submissive posture, and he wanted me to be his subordinate. However, after a year, he would reliably obey the command–he realized he had no choice. I didn’t know it when I was training him, but this command was a lifesaver. As he aged, he got quite a temper. Once he was angry, the only thing that would calm him down was commanding him to play dead, i.e., getting into a submissive posture.
Tether Method
One effective method is to tether your dog to you at all times when he or she isn’t in a crate. You can tether either literally by clipping the dog’s leash to your belt loop or just keep your eyes on the dog at all times. Your goal is to make sure the dog can do no wrong. For example, when you see him or her get an inappropriate chew toy, e.g., your Prada handbag, you can redirect to an appropriate chew toy before any damage is done.

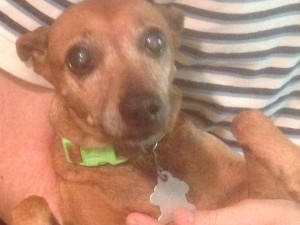
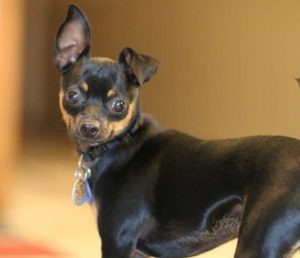
My first dog, Zeus.
After a week or two, you can start letting the dog out of your sight for short amounts of time, building gradually until your dog knows how to behave in the house. I used this method to train Zeus. When I began leaving him for short amounts of time, one of the first things I did was go to the bathroom without him. (Long time dog owners know this is a luxury. lol.) When I came back, he was almost frantic–he had never been left alone before, and he didn’t know what to do! He quickly accepted more freedom.
I have found it is the most rewarding way to train a dog. It is time consuming, but as in all dog training, and most of life, you get out of it what you put into it. Using the tether method, in addition to having a well trained dog, you will have a strong relationship because of spending so much time together.





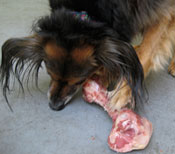 What is a “Raw Food Diet?”




 If ticks are not a problem where you live, you could try citrus juice to repel fleas. Rub your dog’s coat with juice from the citrus fruit of your choice. A word of caution, though: Citrus oil is toxic to dogs and cats,
 Essential oils are increasingly popular, and some people have used rose geranium oil to help prevent tick bites. They apply few drops to the dog’s collar. Use rose geranium oil with caution around your cat and dog as they can be toxic, and never use it on your cat. Although web sites vary on exactly which essential oils are toxic, most agree that some are. In their article “Natural Home Remedies for Flea and Tick Control,”
